Globe SIM Registration – How to Register Your Globe SIM
Globe SIM registration is a mandatory requirement for all Globe subscribers in the Philippines. Under Republic Act No. 11934, every active SIM card must be registered to a verified individual to continue using mobile services without interruption. Globe users who fail to complete the registration process may experience blocked calls, undelivered text messages, disabled mobile data, or full SIM deactivation.
Registering your Globe SIM ensures that your mobile number remains active, secure, and protected against unauthorized use. It also allows you to continue using Globe services such as calls, SMS, mobile data, and prepaid promos without disruption. Every about how Globe SIM registration works, the available registration methods, common issues users encounter, and where to get help if problems arise.
Why SIM Registration Is Required for Globe Users
Globe SIM registration is required to comply with Philippine law and to strengthen mobile security across the country. The SIM Registration Act aims to reduce mobile-related scams, identity misuse, and illegal activities by linking each SIM card to a verified individual.
By completing your Globe registration, you help ensure that:
-
Your mobile number is officially associated with your identity
-
Unauthorized SIM use and fraud risks are reduced
-
You continue to access Globe services without service interruption
Unregistered or incorrectly registered SIM cards may be restricted or permanently deactivated. Globe sends reminders to users who have not yet completed registration, but failure to act within the required timeframe can still result in loss of service.
Who Needs to Register a Globe SIM
Globe SIM registration applies to all Globe subscribers, including:
-
Prepaid users
-
Postpaid users
-
Platinum subscribers
Both new and existing Globe SIM cards must be registered. Even if your SIM has been active for many years, registration is still required to maintain uninterrupted service.
Register Your Globe SIM in 5 Simple Steps
The Globe SIM registration process is designed to be simple and accessible. Most users can complete registration within a few minutes if all information and documents are ready.
Access the official platform
- Visit the official website (https://www.globe.com.ph/) or open the GlobeOne app.
Select your SIM registration type
- Choose whether your SIM is prepaid, postpaid, or belongs to another supported category.
Verify your Globe mobile number
- Enter your mobile number and confirm ownership using the one-time password (OTP) sent via SMS.
Upload a valid government-issued ID and selfie
- Provide a clear photo of your ID and take a selfie for identity verification.
Review and submit your registration details
- Double-check your information before submitting and save the reference number provided.
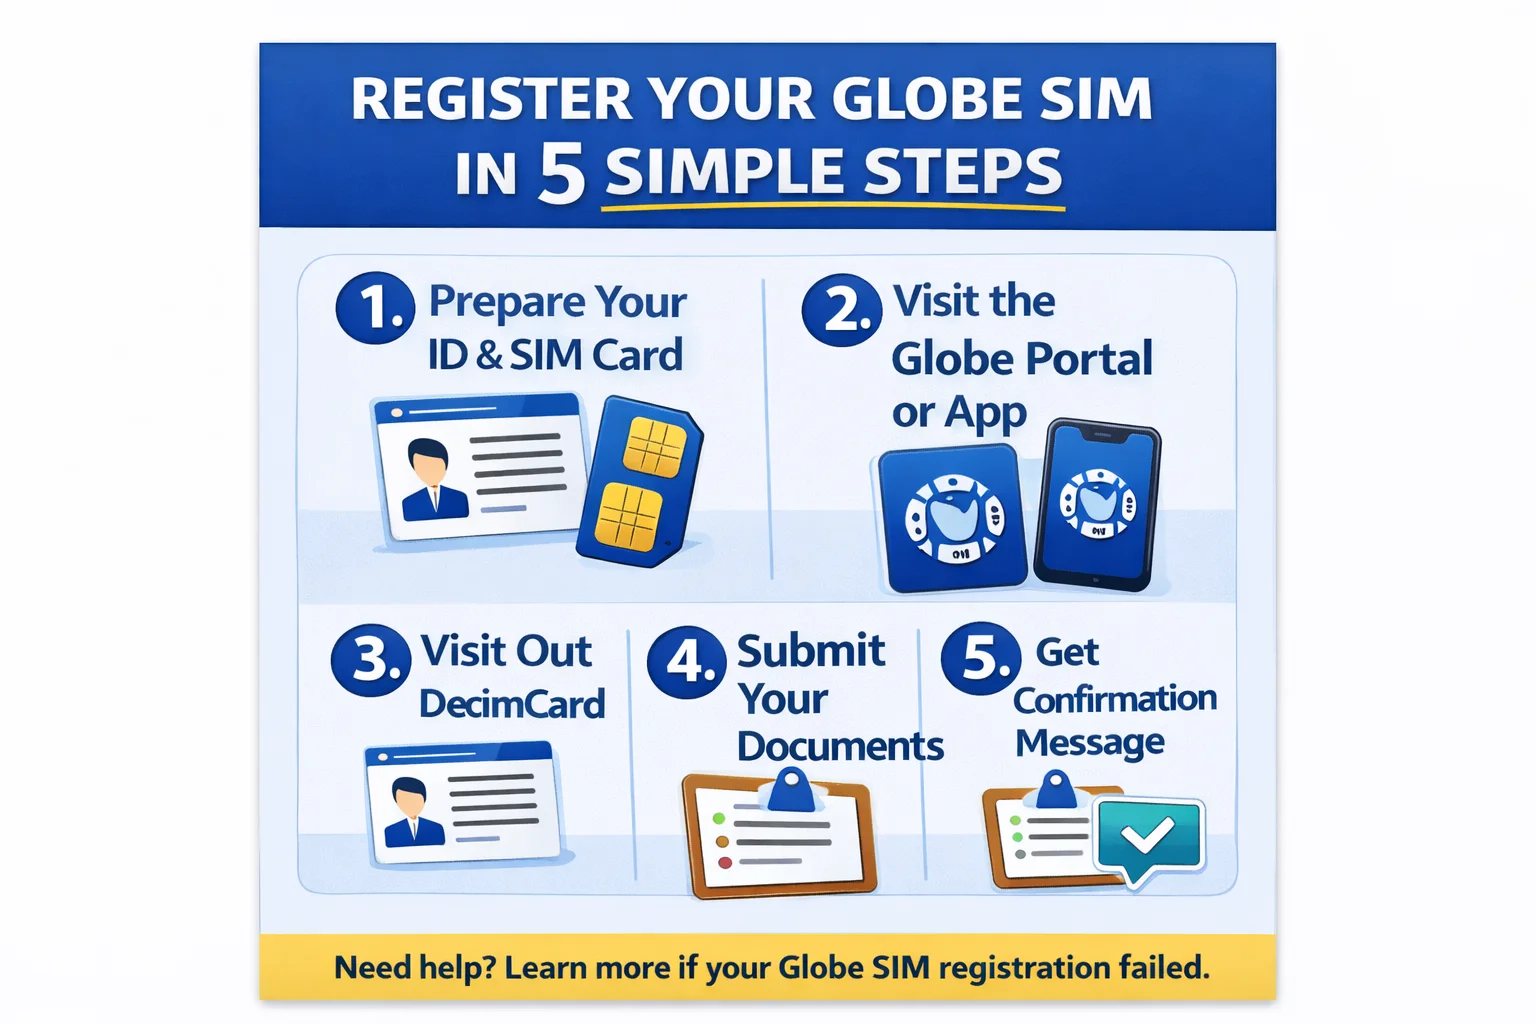
The reference number serves as proof that your registration has been submitted successfully and may be required for future updates or troubleshooting.
If your submission does not go through or shows errors, refer to the Globe SIM Registration Failed – How to Fix It guide for solutions.
Ways to Register Your Globe SIM
Globe offers multiple registration options so users can choose the method that best suits their situation.
Register Through the Official Globe Portal
Online registration through the Globe SIM registration portal is the most common method. It can be accessed using a smartphone, tablet, laptop, or desktop computer with an internet connection.
This method allows users to:
-
Complete registration at any time
-
Upload documents digitally
-
Receive confirmation immediately after submission
Online registration is recommended for users who have stable internet access and a working mobile number to receive OTP messages.
Register Using the GlobeOne App
The GlobeOne app provides a convenient way to register and manage your Globe SIM. The app may automatically fill in some account details, making the process faster for existing Globe users.
Benefits of using the GlobeOne app include:
-
Centralized account management
-
Easier access to registration status
-
Quick support options
Learn more about how the app works on the GlobeOne App page.
Register at a Globe Store
Users who prefer face-to-face assistance or experience issues with online registration may complete the process at a Globe Store. Globe staff can help verify documents, resolve registration errors, and assist with SIM-related concerns.
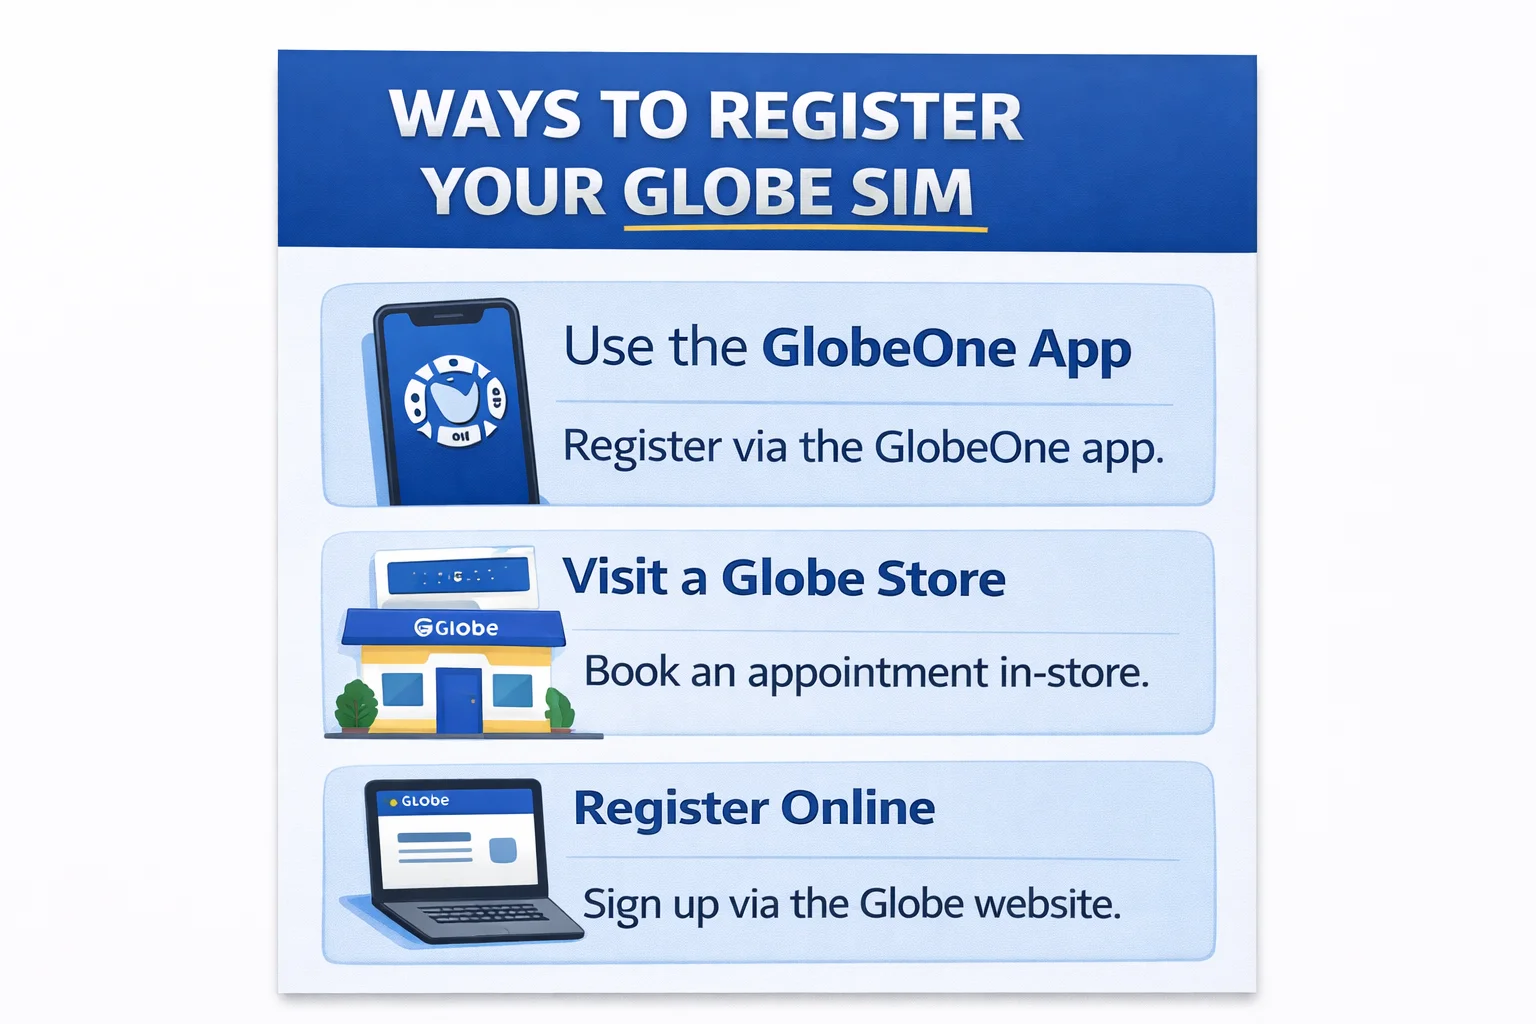
Before visiting, you may schedule an appointment through the Globe Appointment page to reduce waiting time.
Requirements for Globe SIM Registration
To complete the Globe register successfully, users must provide accurate personal information and valid identification.
Valid ID Requirements
Globe accepts government-issued IDs for verification. Your ID must be:
-
Clear and readable
-
Not expired
-
Complete and uncropped
-
Matching the personal details you provide
Examples of accepted IDs include:
-
Philippine Passport
-
Driver’s License
-
UMID
-
National ID (PhilSys)
-
Postal ID
-
PRC License
-
PhilHealth ID
Uploading unclear or mismatched documents may result in delays or rejection.
Common Problems During Globe SIM Registration
Some users encounter issues while registering their SIMs. These problems are usually temporary and can be resolved with proper steps.
Registration Failed
- This may occur due to incomplete details, unclear ID photos, or system delays. Always ensure that your information matches your ID exactly.
No Service After Registration
- Some users experience a temporary loss of signal after registration while verification is ongoing. If the issue persists, check the How to Fix No Service Globe SIM Card guide.
OTP Not Received
- OTP issues may be caused by a weak signal, network congestion, or expired codes. Wait a few minutes before requesting a new OTP.
App or Portal Issues
- Temporary system maintenance or browser issues may prevent registration. Trying again later or switching devices may help.
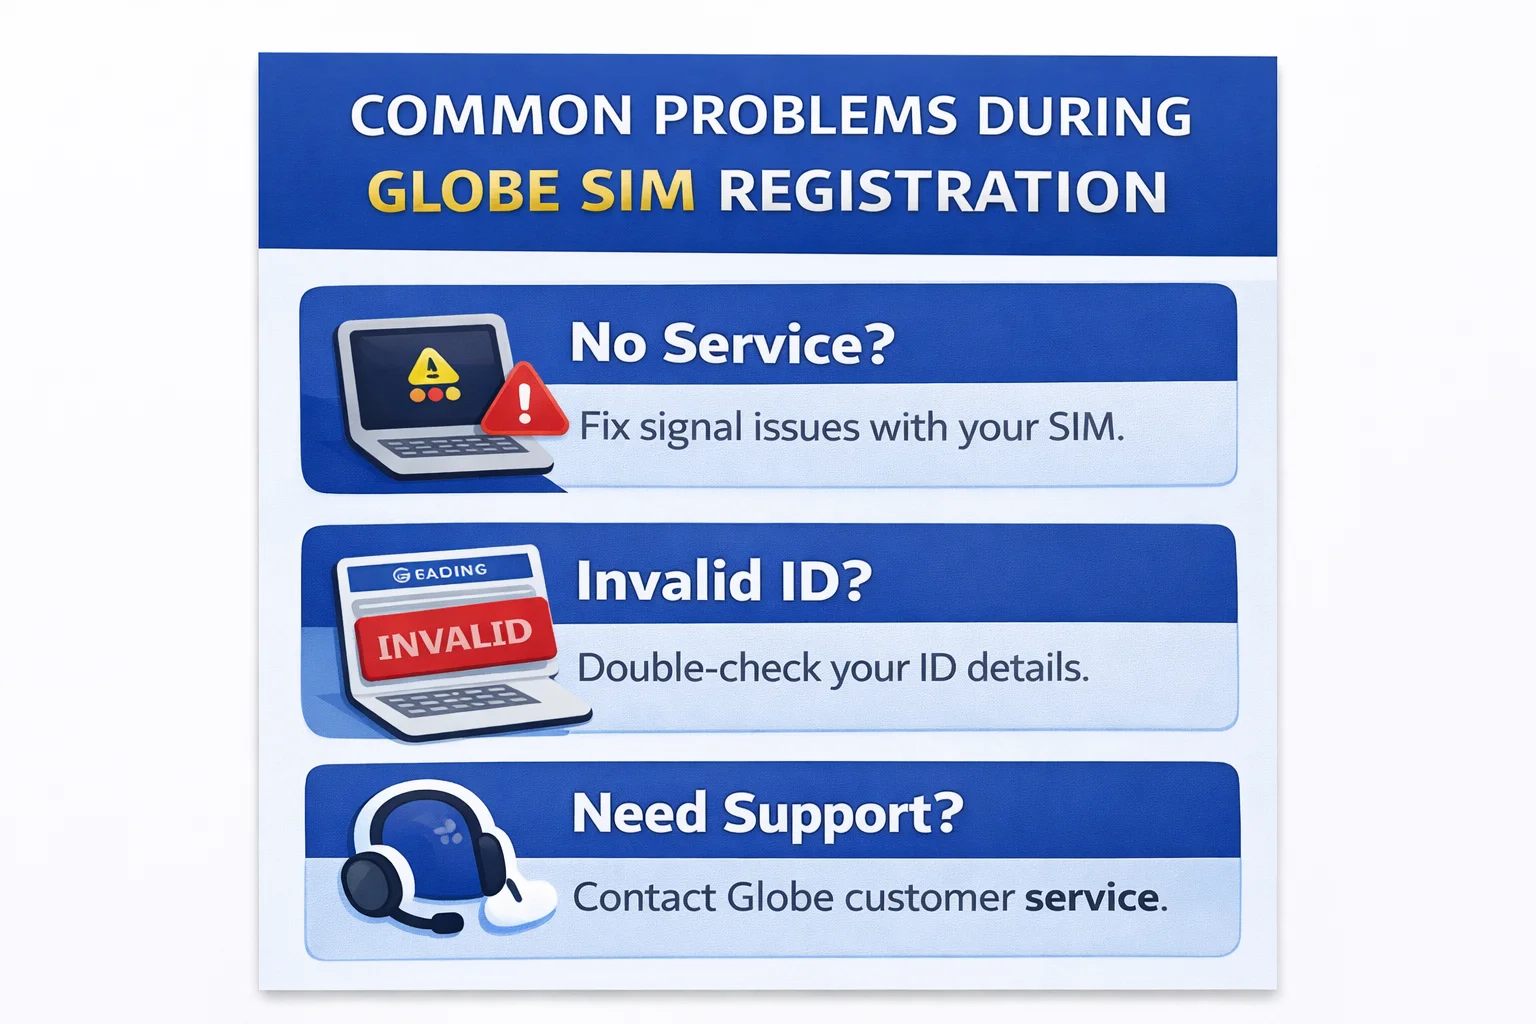
For unresolved issues, contact Globe Customer Service for assistance.
What to Do After Registering Your Globe SIM
After successful registration, your SIM remains active and fully functional. You can then manage your Globe services normally.
Check Your Globe Balance
- Monitoring your balance helps you stay updated on usage and remaining credits.
Visit How to Check Balance in Globe for instructions.
Register and Use Globe Promos
- Registered SIMs can access Globe prepaid promos for calls, texts, and data.
Explore available options on the Globe Prepaid Promos page.
Manage Your Account with GlobeOne
- The GlobeOne app allows you to track usage, manage subscriptions, and access support services easily.
How to Get Help from Globe
If you encounter issues during or after registration, Globe provides multiple support channels.
Customer Service Hotlines
- Users can contact Globe support using official hotline numbers for assistance with SIM registration concerns.
GlobeOne App Support
- The app offers in-app help options and real-time account information.
In-Store Assistance
- Globe Stores provide hands-on support for registration problems, SIM replacement, and identity verification.
Visit the Globe Customer Service page for complete support details or book a visit through Globe Appointment.
Just focuses exclusively on Globe SIM registration and related services for users in the Philippines. Information is regularly updated to reflect current registration procedures, common issues, and official Globe support options.
Completing your Globe SIM registration ensures uninterrupted service, improved security, and full access to Globe’s mobile features.
FAQ
Can I register my SIM using GCash or the GlobeOne app?
As of now, SIM registration must be done via the website. But you can use the apps to verify status.
What if I lost my registered SIM?
Go to a Globe Store for SIM replacement. You’ll be asked to verify your registration details.
Do I need to register again if I transfer my SIM to another phone?
No. Registration is tied to the SIM, not the device.
Can I register a SIM using someone else’s ID?
No. The ID must match the SIM owner’s name.
What if I made a typo in my name or address?
Visit a Globe Store or call 211 for help correcting it.
Do I need to re-register if I switch networks (e.g., Globe to GOMO)?
No. But you’ll need to register the new SIM from the new network separately.
How do I register my old Globe SIM?
You can register your old SIM using the official Globe registration portal or the GlobeOne app. Enter your mobile number, verify through OTP, upload your valid ID and selfie, and save your reference number.
What ID can I use for SIM registration?
You may use any government-issued ID, such as National ID, Passport, UMID, Driver’s License, SSS ID, Voter’s ID, PRC ID, PhilHealth ID, Postal ID, or Senior Citizen ID.
What if I don’t receive the OTP?
Restart your phone, switch to mobile data, toggle airplane mode, or move to an area with better signal. Tap Resend OTP after 2 minutes. Try again during non-peak hours if the issue continues.
How long does approval take?
Most registrations are approved instantly. Some may take 24–48 hours if manual review is required or if uploads were unclear.
Can tourists register a Globe SIM?
Yes. Foreign nationals can register a Globe prepaid tourist SIM using their passport, Philippine address, and visa/arrival details. Tourist SIM validity usually matches the length of stay.
How do I register my Globe at Home WiFi SIM?
Open 192.168.254.254 in your browser, log in using the modem’s admin details, enter your SIM number, verify via OTP, upload your ID and selfie, then submit.
- How to Fix No Service Globe SIM Card? No Signal, Data Not Working - December 29, 2025
- How to Share Load in Globe via Text - December 29, 2025
- How to Convert Globe SIM to esim? - December 29, 2025
